Beanie Client Quickstart
Use Beanie client integration to sell products and subscriptions defined in your Stripe Dashboard.
Before starting:
How to create a Beanie hosted payment page:
Integration requirements
The first thing that you have to do is tocreate an Octobat account.
Then, you have to own aStripe account.
Connect your Octobat and Stripe accounts
During your registration, you will be able to connect your Stripe account. At this moment, Octobat asks you read and write accesses to your Stripe account.
Testing
Octobat provides a test environment which allows you to test all Octobat features unlinmited. You'll be able to make API calls, sync your Stripe Test environment and generate data reports or exports.
Using Beanie within the test environment is easy. You just have to deal with your Octobat test or live API publishable key.
Step 1:Configure products and plans in your Stripe account
Beanie works only with the Stripe payment provider. Stripe provides a product management feature that allows you to create plans for recurring payments or product for one-time purchase.
You'll be able to create these products on yourStripe Dashboard. Be sure to be in the correct environment when you create your Stripe products.
Step 2:Add Beanie to your website
To use Beanie on your website, you must add a snippet of code that includes the desired SKUs or plan IDs. You can use the Dashboard to generate the necessary code, or you can write it yourself.
Go to the Octobat Configuration. Then, go to Collect payments and Beanie (https://app.octobat.com/configuration/beanie_configurations).
Here you'll be able to "add a Beanie Configuration".
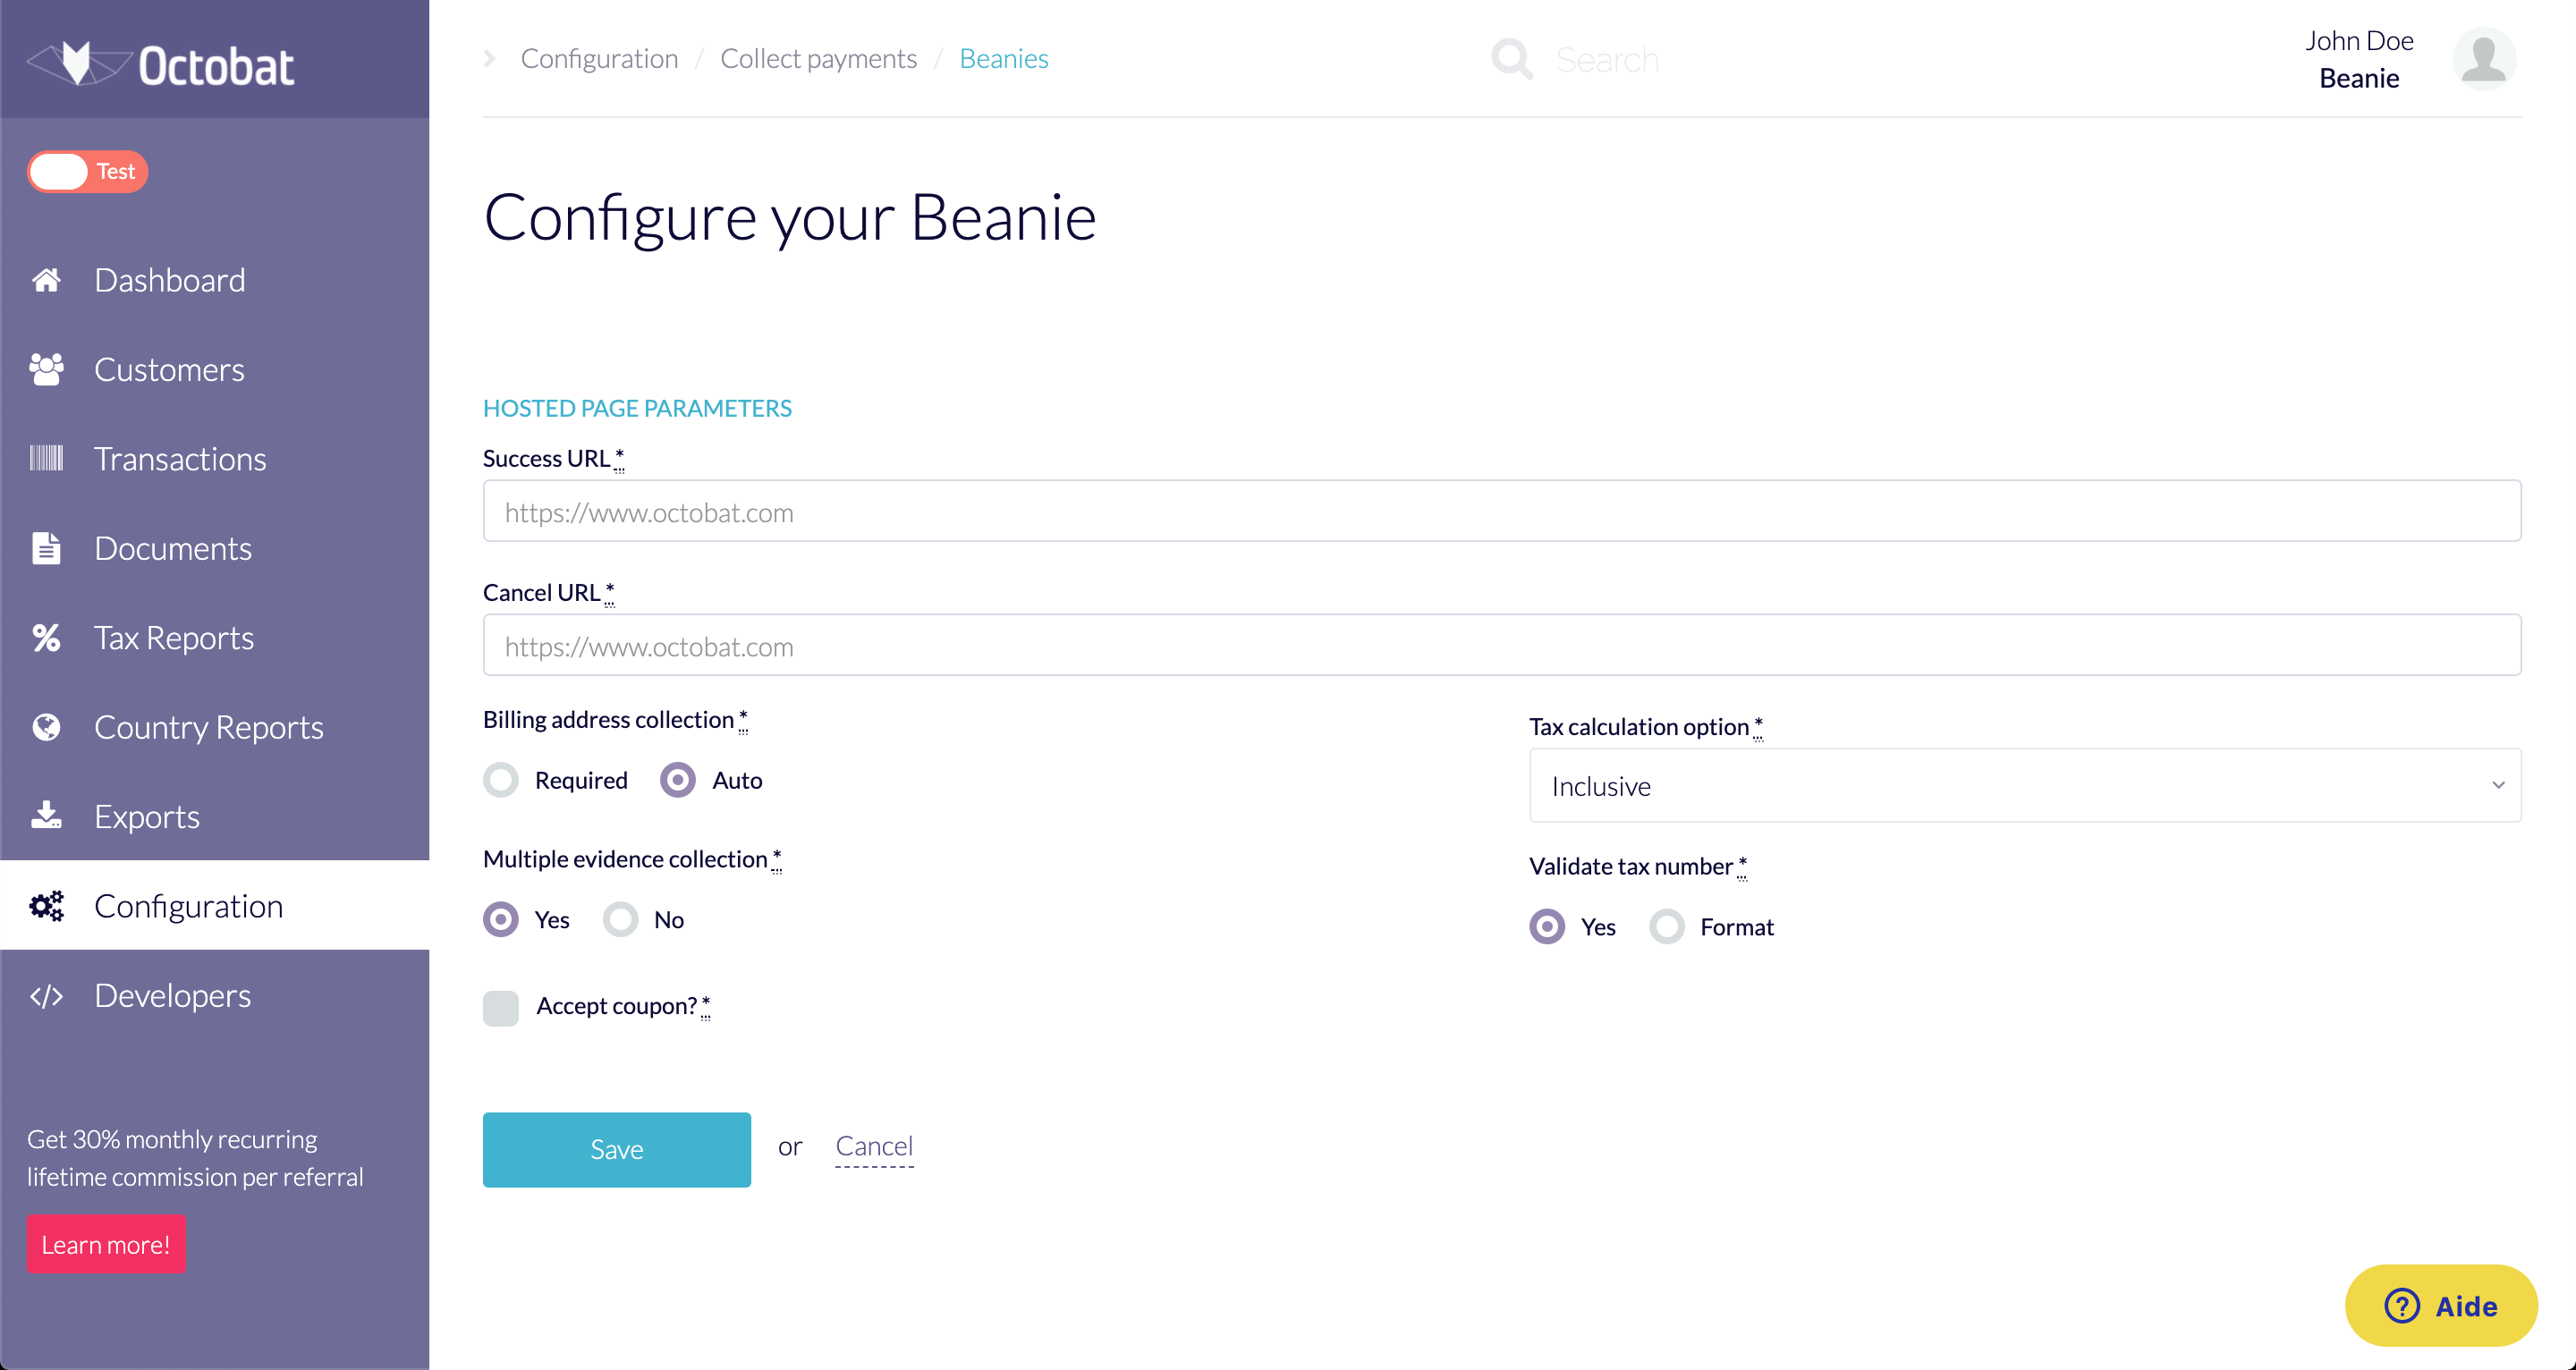
The form above allows you to change the options of your Beanie hosted payment page.
| Option name | Option Description | Default Value |
|---|---|---|
| Success URL | The URL returned after your client pays with success | empty |
| Cancel URL | The URL returned after your client cancels the payment process | empty |
| Billing Adress Collection | The "Required" option adds these fields to your payment form:
| Auto |
| Tax Calculation Option | Include or exclude the tax amount of the price. More information on this page:What is the difference between tax included vs tax excluded? | Inclusive |
| Multiple Evidence Collection | If "Yes", in order to calculate the correct tax rate, the evidences will be:
| Yes |
| Validate Tax Number | If "Yes", check the validity of the tax number via the VIES API. If "Format", only check the regular expression of the string. NB: Depending on your choice, the customer with a correct tax number will be a business. With all consequences that it will have on the tax rate applied. | Yes |
| Accept Coupon? | If checked, your Beanie page will accept coupon from Stripe (Coupons) and Octobat (Coupons). Else, no coupon will be recognized. | Unchecked |
Then, you'll be able to use this configuration with Beanie. Click the "Use with Beanie" button. It will display a popup.

Enter Stripe SKUs product or Stripe plan IDs that you've created in the Step 1. Then, click the "Generate code integration" button in order to generate a snippet that you can add to your website.
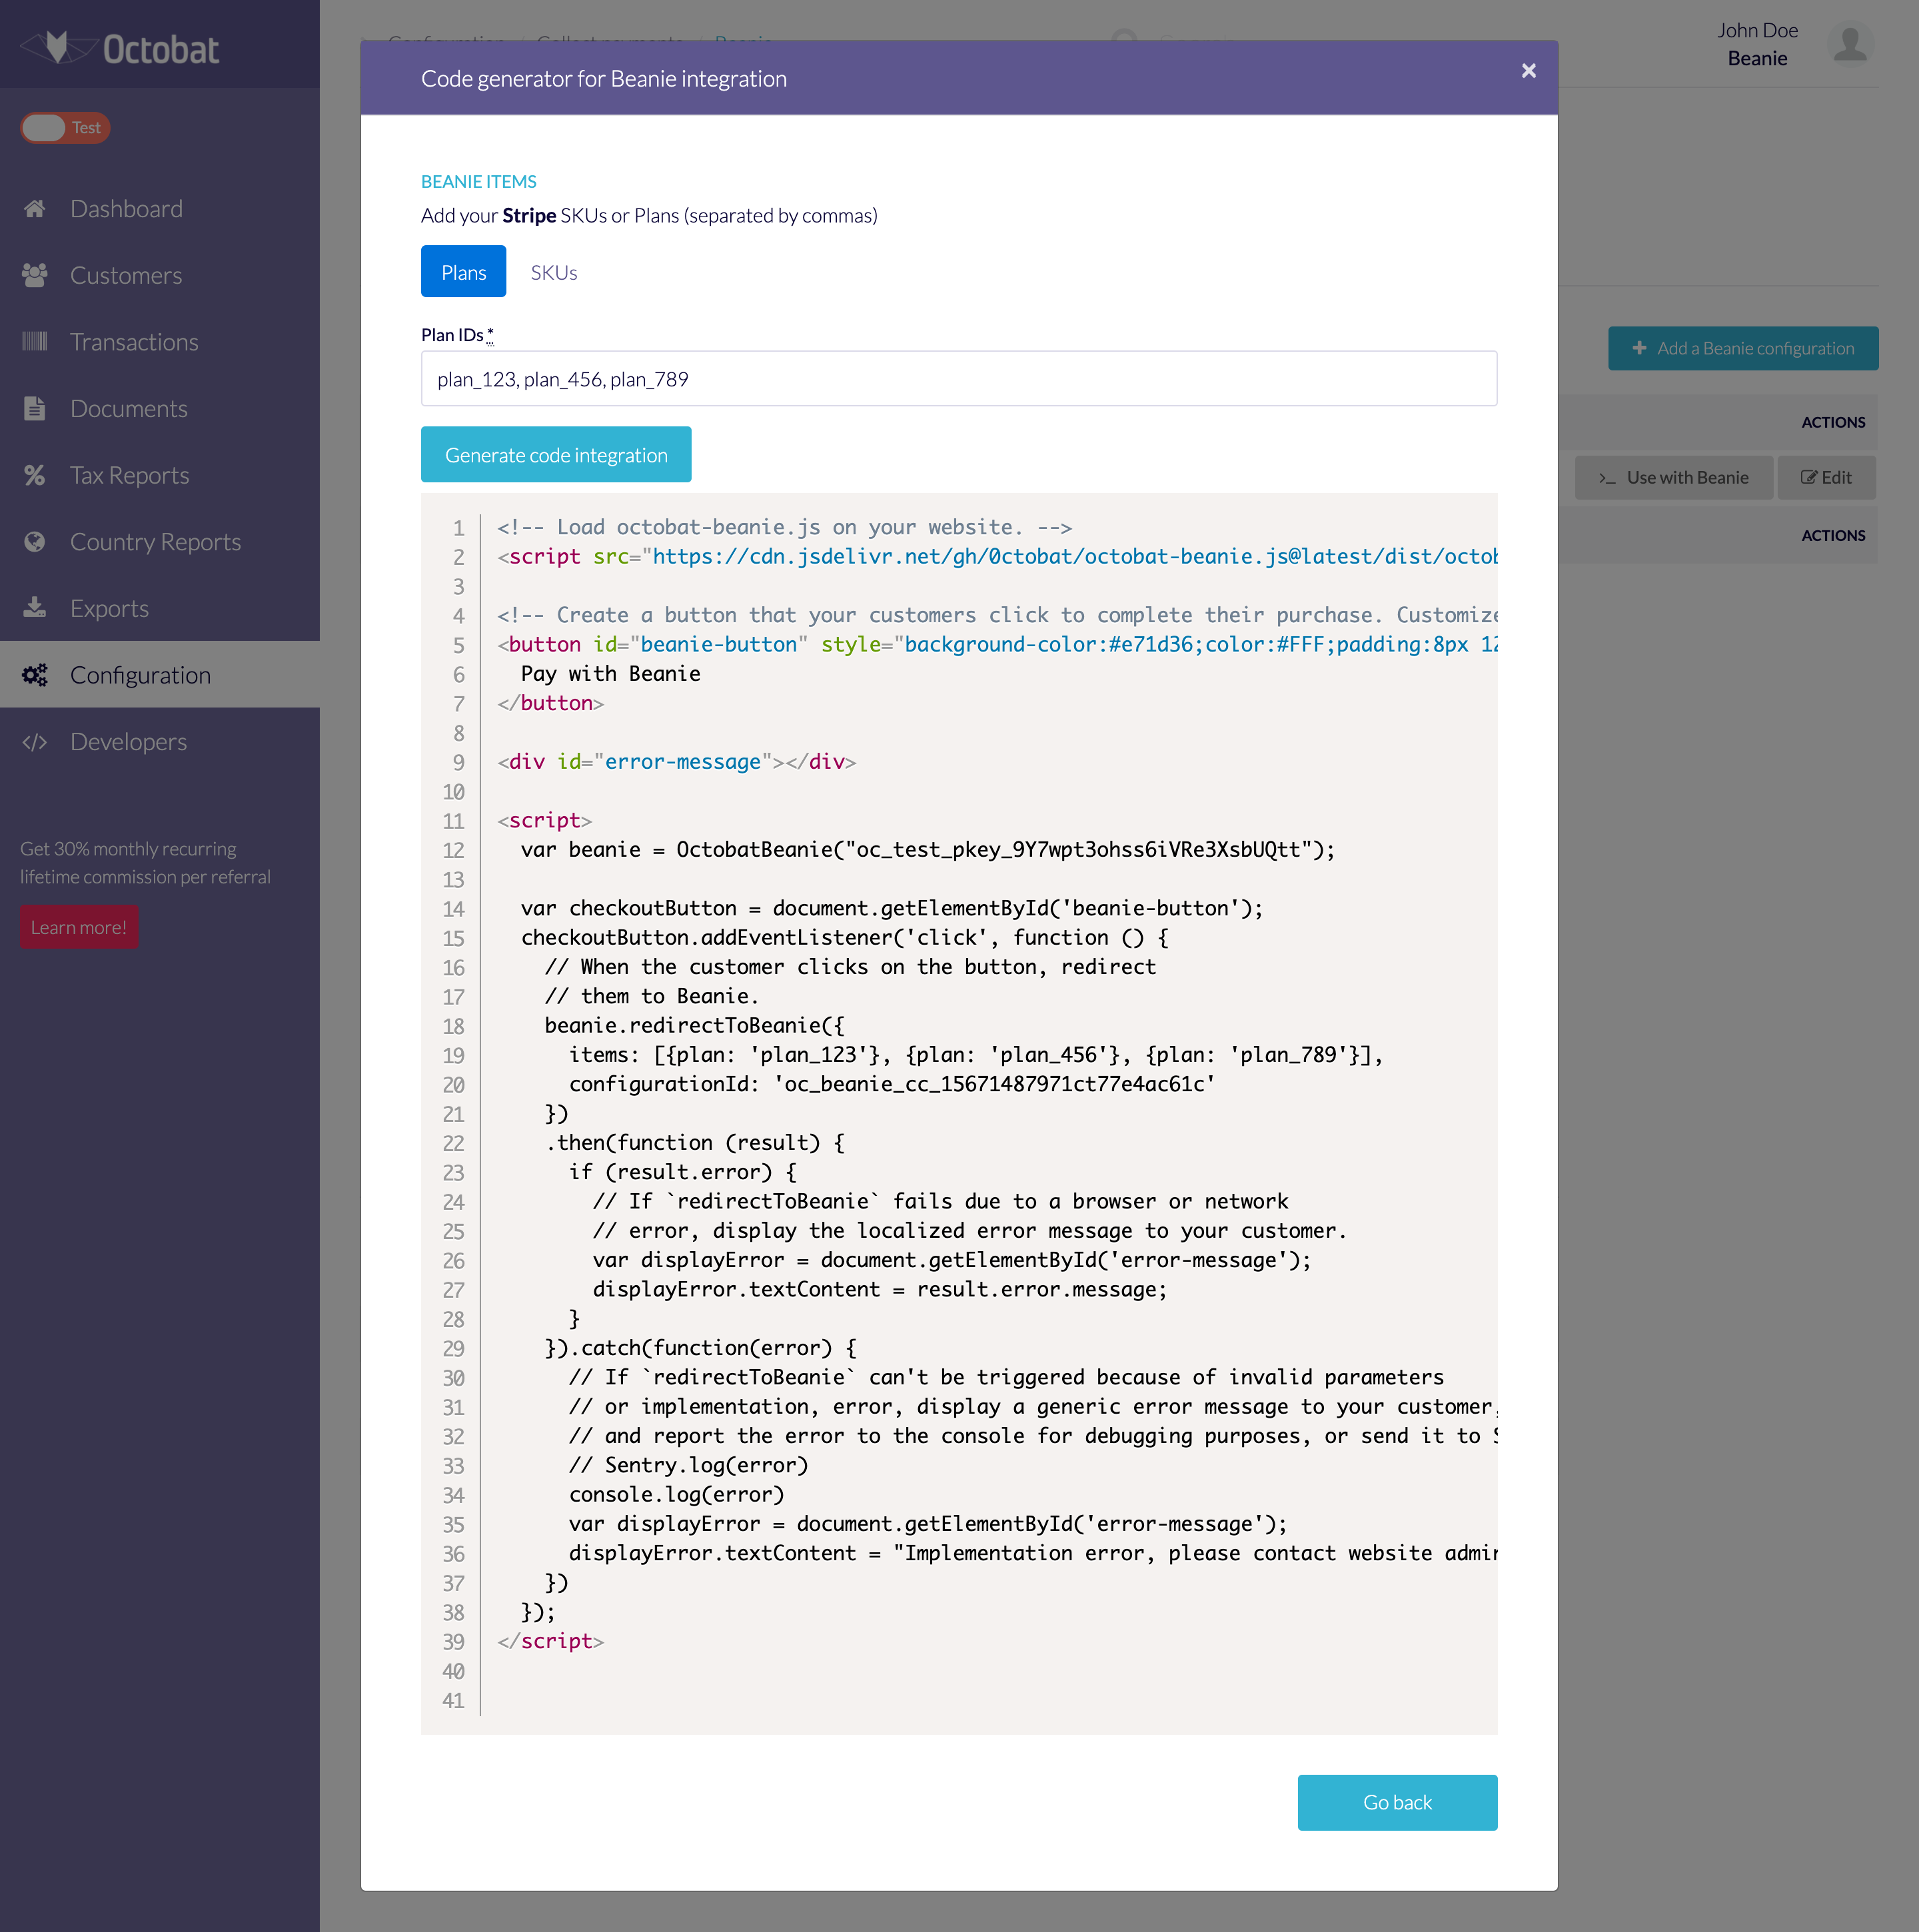
Copy and paste the snippet into the body of a web page to add a payment button that redirects the customer to your Beanie hosted payment page.